Packaging a mod with tcli
Before anything, you have to install the tcli, this can be done with dotnet tool install -g tcli.
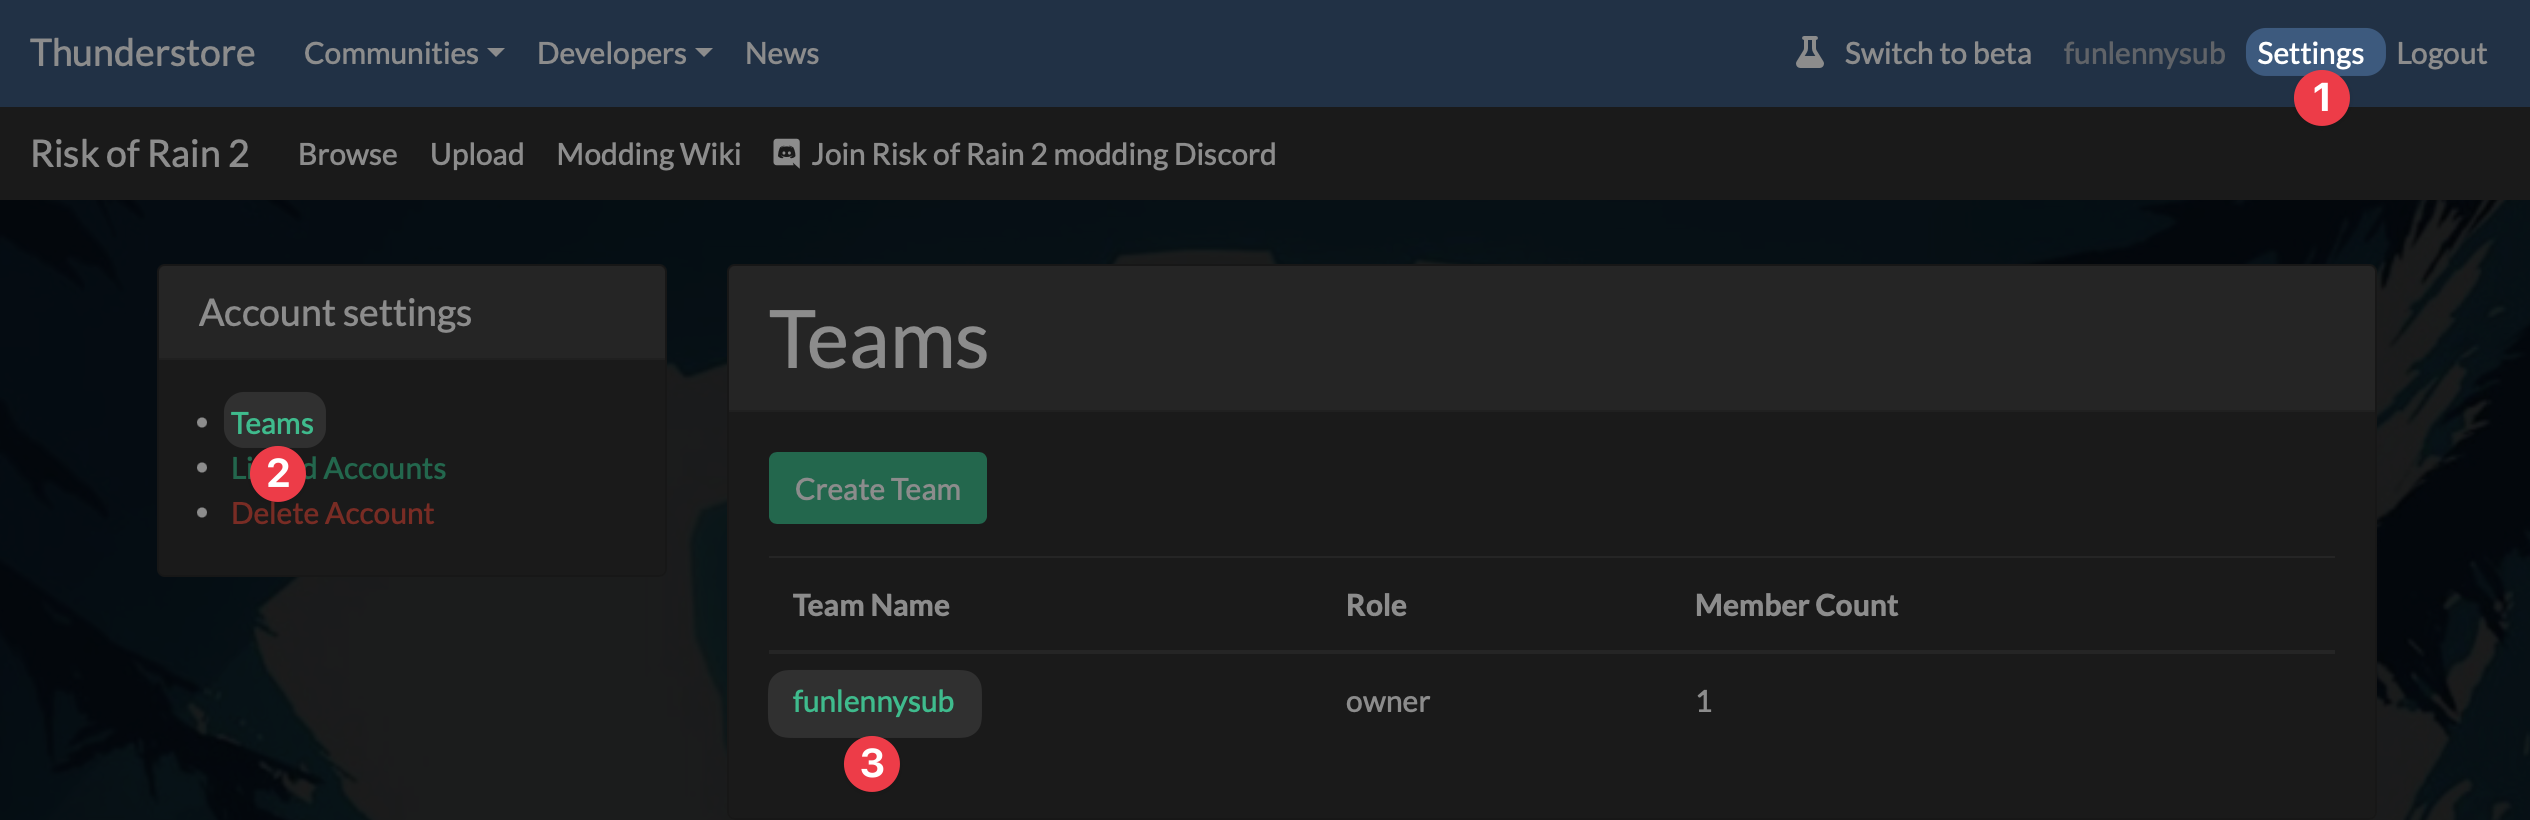
Now to use the CLI, you have to create an API token. This can be done by going to your account Teams and selecting the team you created in the previous step.
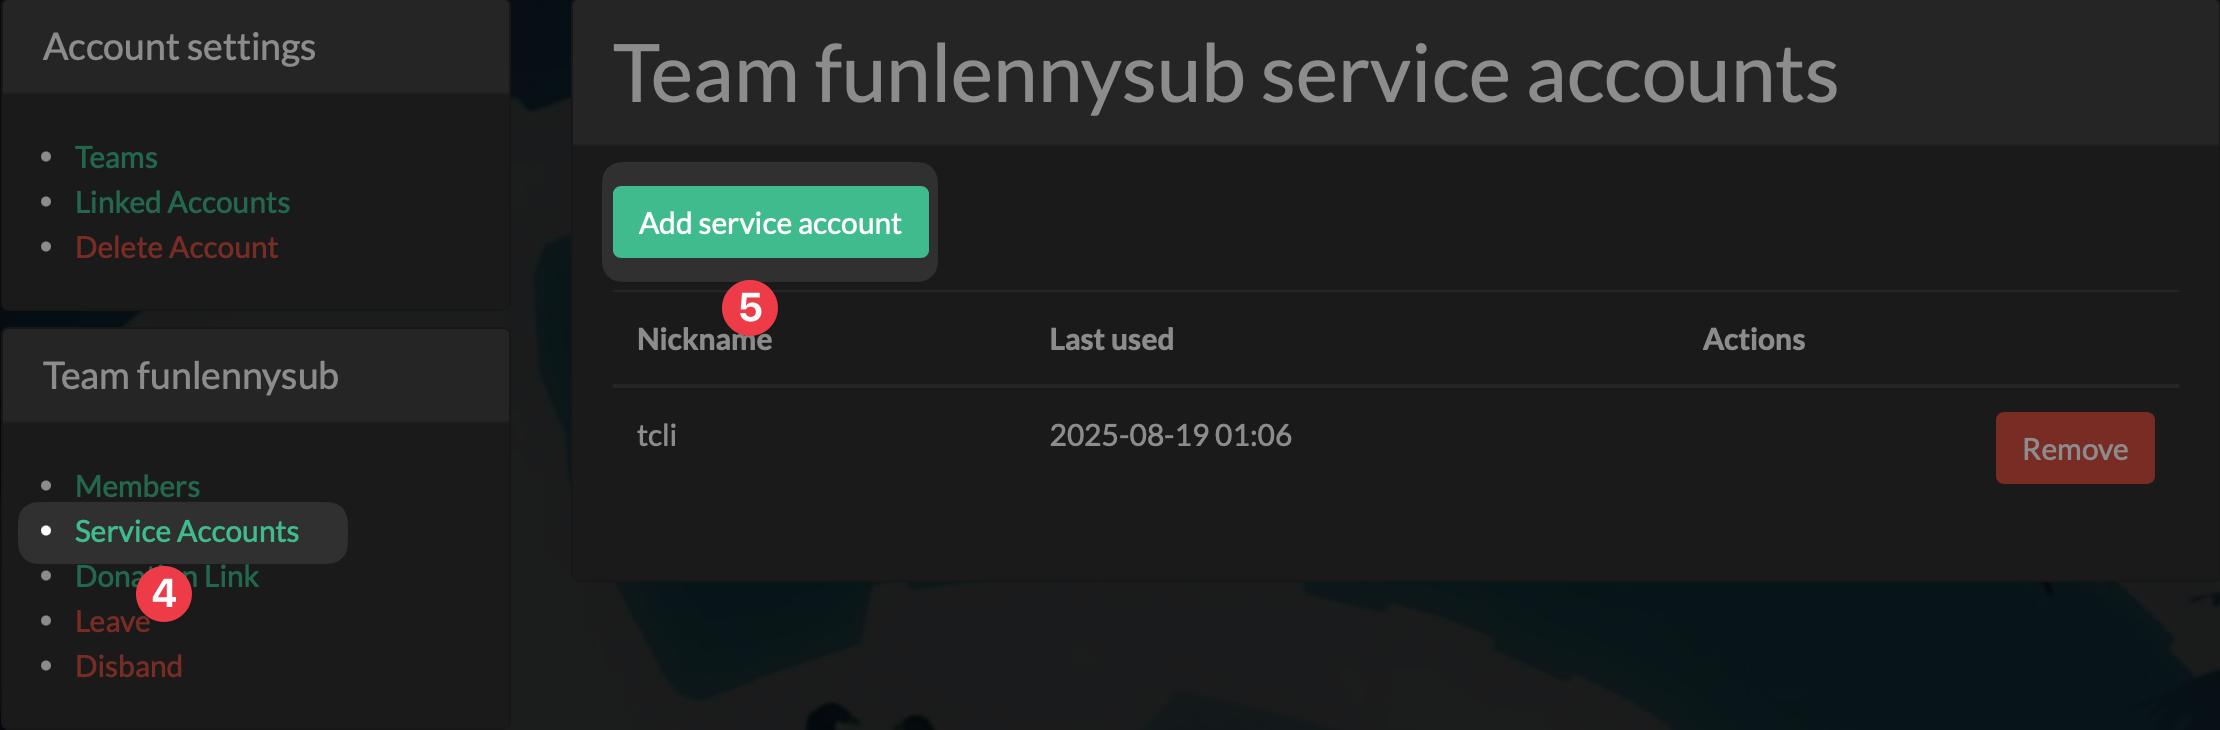
Now press Serivce Accounts and click on Add service account button.
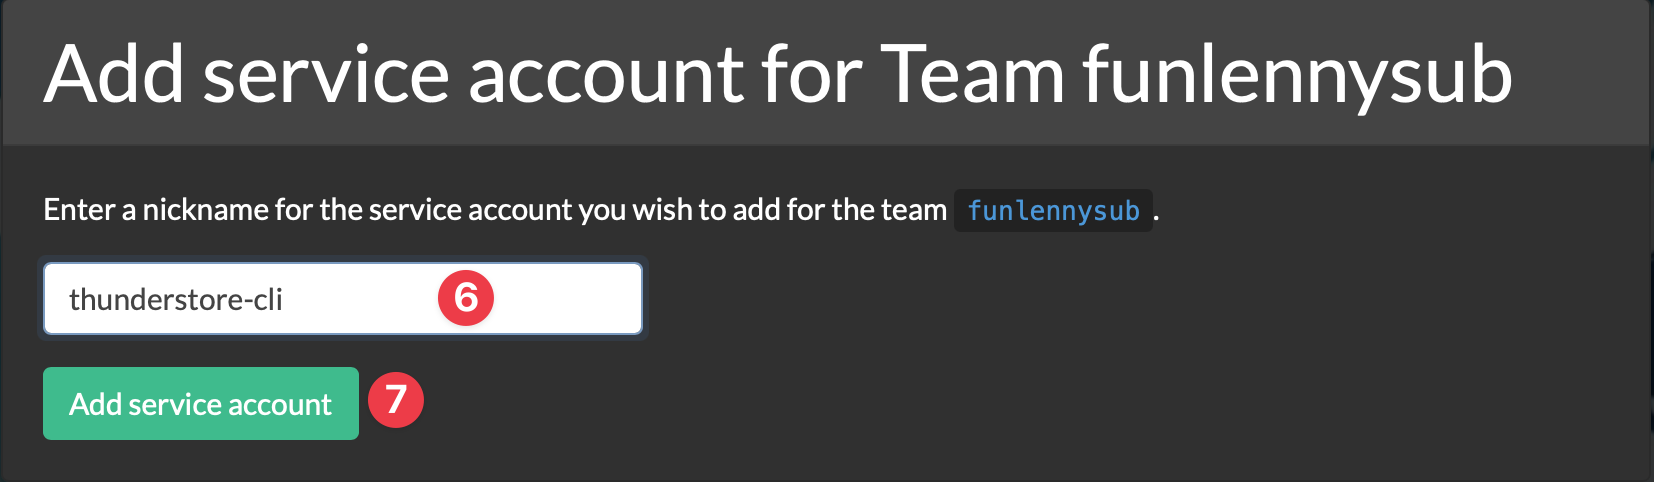
Give it a name you can easily recognize (e.g. tcli or thunderstore-cli) and now click Add service account below the input field.
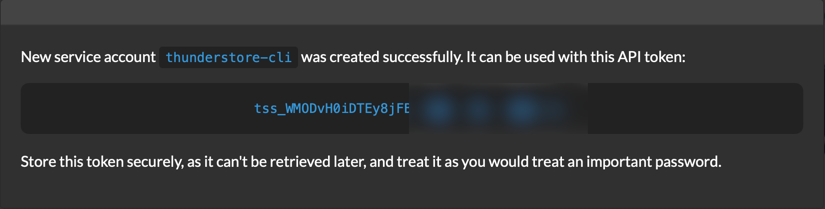
One last step is to copy the token and store it somewhere for now.
DANGER
Don't share this token anywhere because it can be used to upload mods under your name.
Setting up environment for CLI
TIP
If you used funlennysub's template you can skip to Configuring tcli
In order for tcli to work it needs thunderstore.toml. To create it and other important files, simply run tcli init in your project root.
This will create several files:
-
icon.webp- used for your mod icon on Thunderstore -
README.md- readme of your mod to be shown on the Thunderstore webpage -
thunderstore.toml- configuration file for your package
Configuring tcli
Before publishing, you have to make a few changes to the generated thunderstore.toml.
[config]
schemaVersion = "0.0.1"

[package]
# Enter the name of your Thunderstore team name instead of AuthorName
namespace = "AuthorName"
# Replace PackageName with your mod name
name = "PackageName"
# Remove versionNumber because it will be provided during build/publish
versionNumber = "0.0.1"
description = "Example mod description"
# Usually websiteUrl is set to your mod github repository url
websiteUrl = "https://thunderstore.io"
containsNsfwContent = false

[package.dependencies]
AuthorName-PackageName = "0.0.1"
# Add dependency to BepInEx package
BepInEx-BepInExPack_Mycopunk = "5.4.2403"

[build]
icon = "icon.webp"
readme = "README.md"
outdir = "build"

[[build.copy]]
source = "./dist"
target = ""
# Replace PackageName with your DLL name.
# P.S. For target you can just use 'plugins/PackageName.dll', but keeping BepInEx makes manually installing mods easier.
source = "bin/Release/net48/PackageName.dll"
target = "BepInEx/plugins/PackageName.dll"

[publish]
repository = "https://thunderstore.io"
communities = [ "riskofrain2", ]
# Since you're modding Mycopunk you have to set the community to mycopunk
communities = [ "mycopunk", ]

[publish.categories]
riskofrain2 = [ "items", "skills", ]
# This also goes for categories
mycopunk = [ "client", ]
TIP
List of available categories can be read from here. Value under slug field is what should be used
At this point you're almost ready to publish your mod to Thunderstore and all you have to do now is build your mod. To do so, just build it from IDE or using dotnet build -c Release from project root. Once the project is built successfully you're now able to publish your mod.
Testing
However, before publishing it's recommended to make sure you set up everything correctly, in order to do that you can run tcli build --package-version MAJOR.MINOR.PATCH, this should output a .zip inside build folder.
Check your package structure
If you unzip your package it should look like this:
-
AuthorName-PackageName-x.y.z -
BepInEx -
plugins -
PackageName.dll
-
-
-
-
icon.webp -
manifest.json -
README.md -
CHANGELOG.md(Optional)
TIP
If you want to know more about how to structure your package, you can use this guide and this one.
Test locally
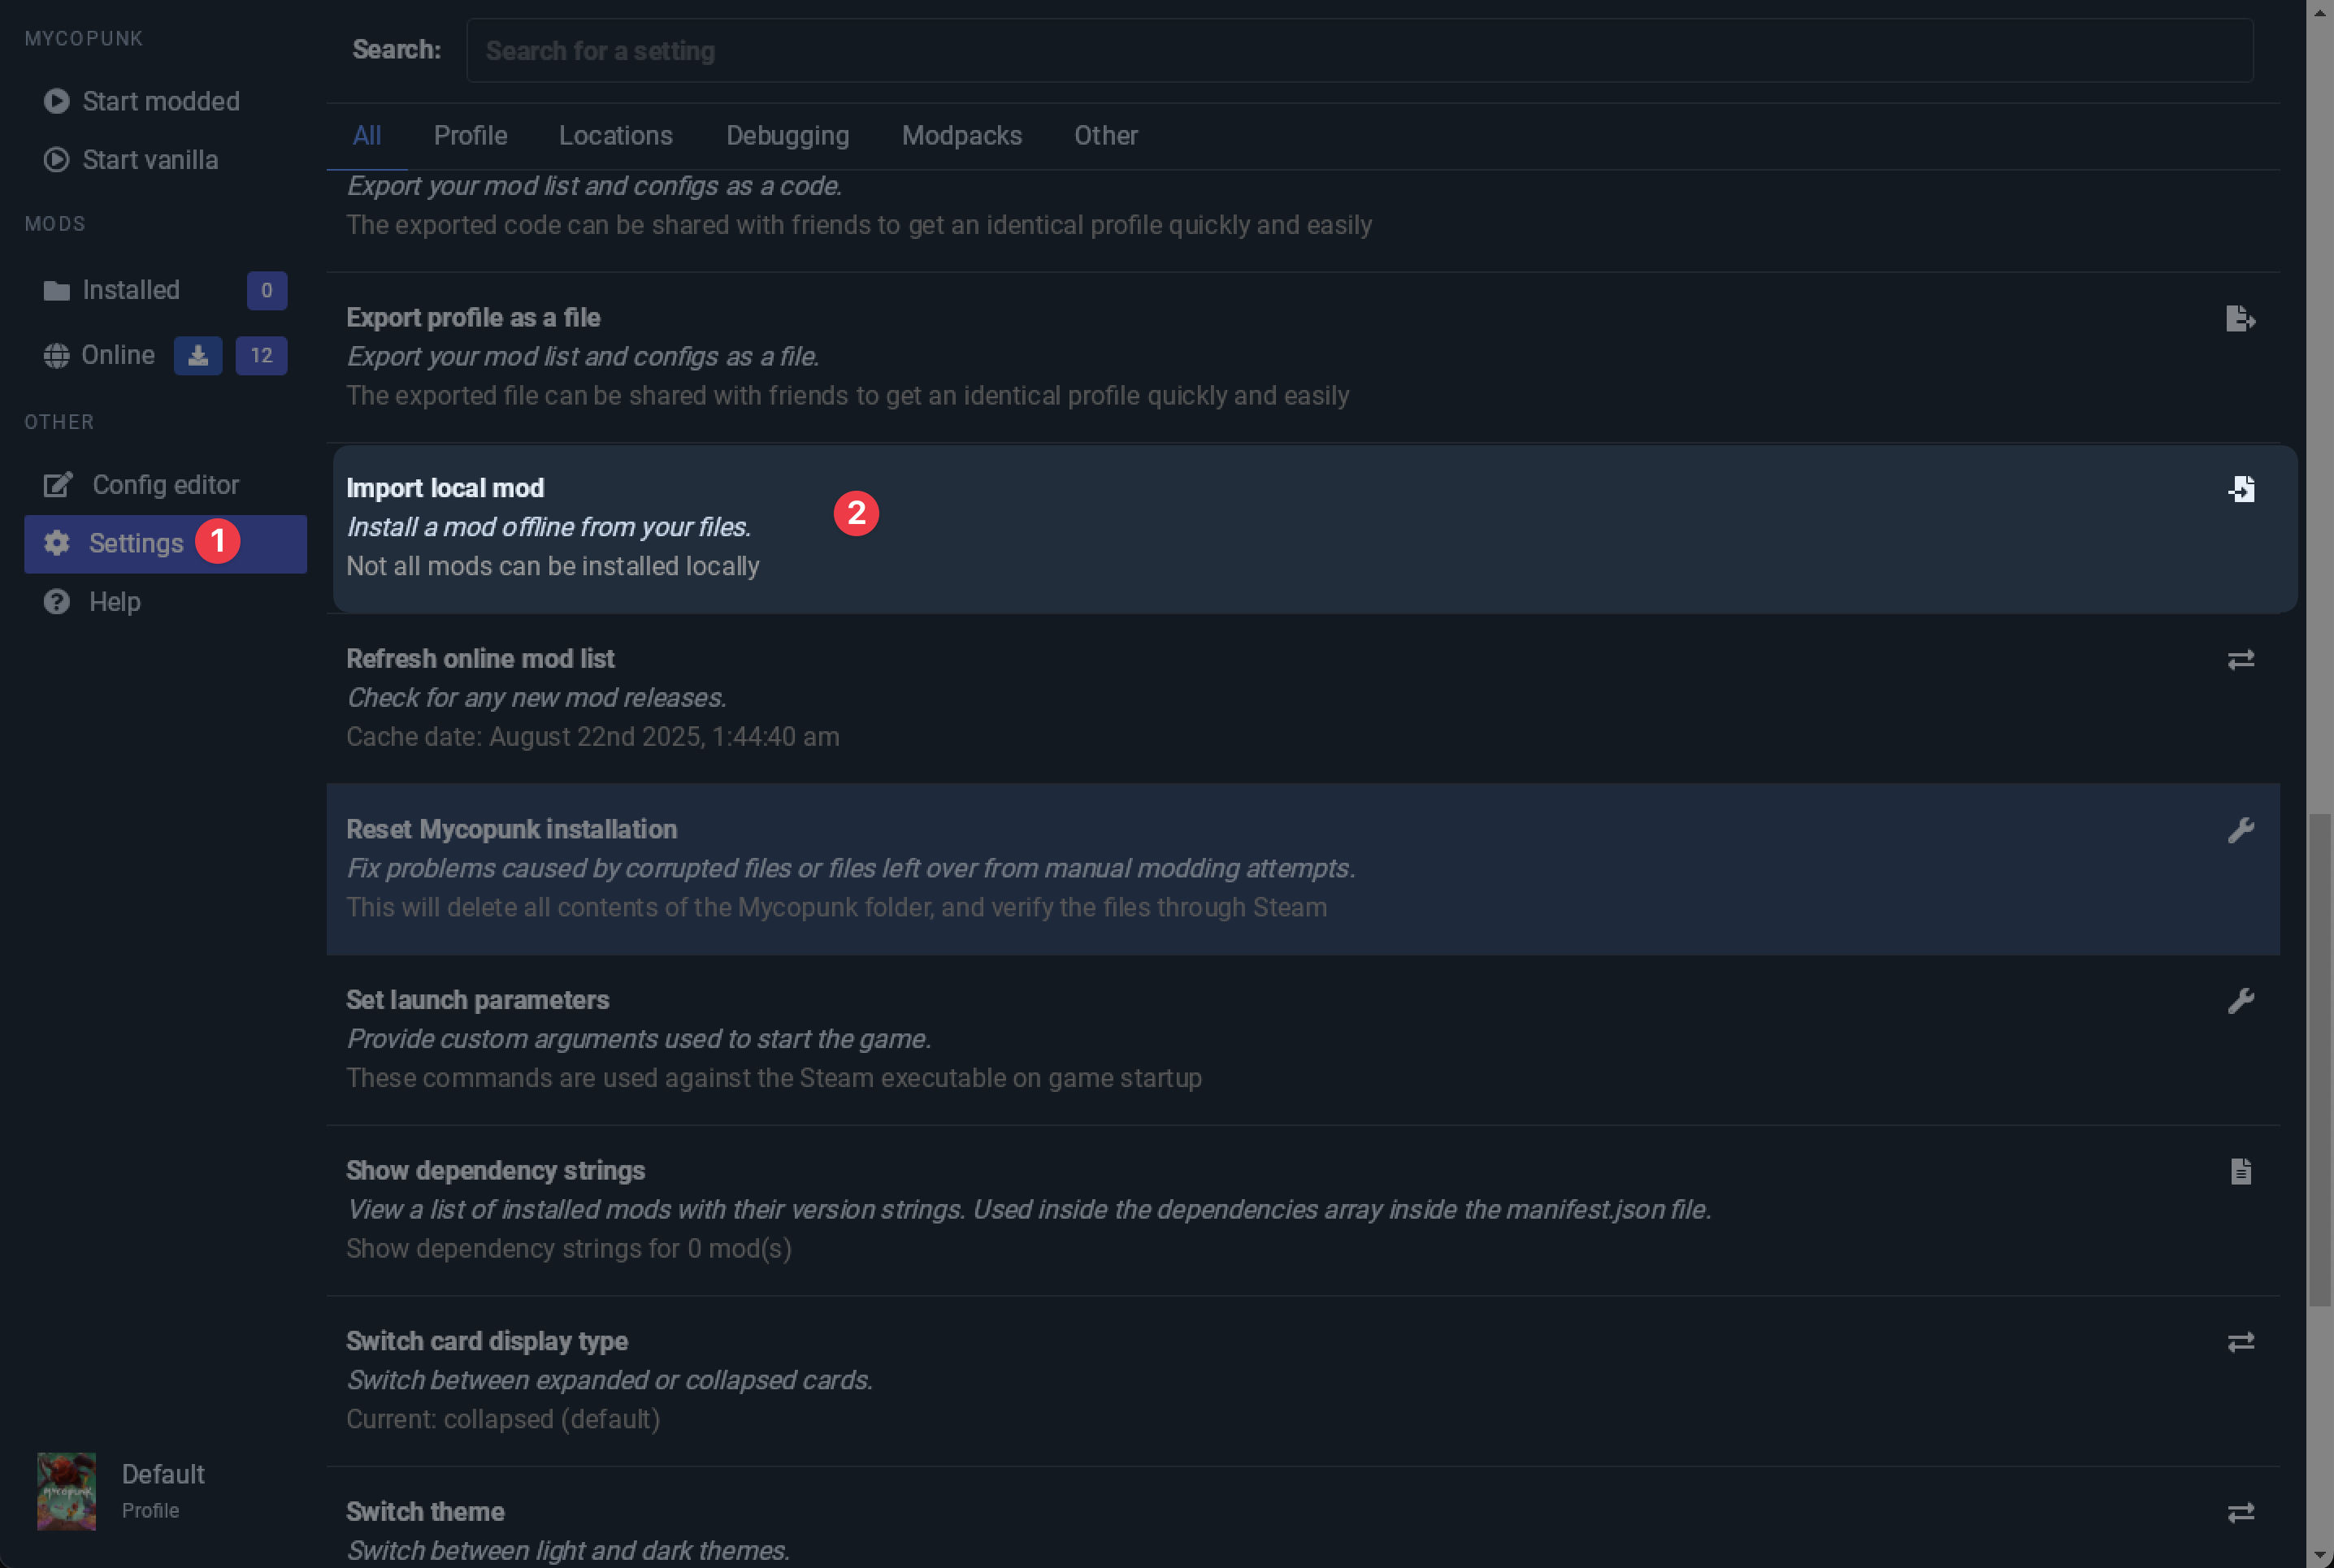
To test if your package got built correctly you can open up r2modmanPlus, select Mycopunk in game list, go to Settings and scroll down until you find Import local mod
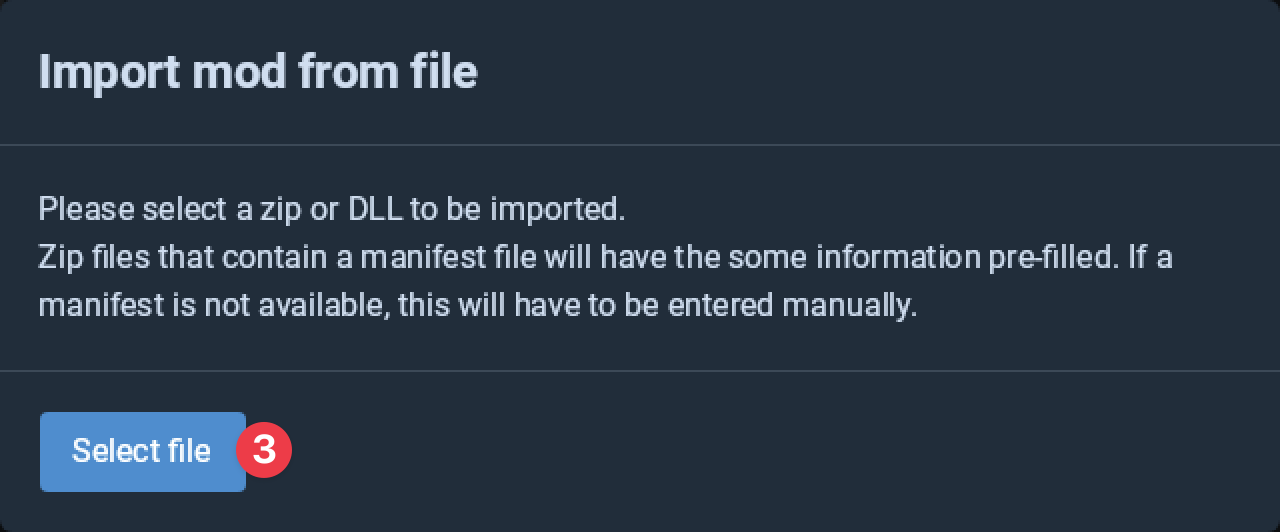
There you will have to click Select file button and select the .zip file tcli produced.
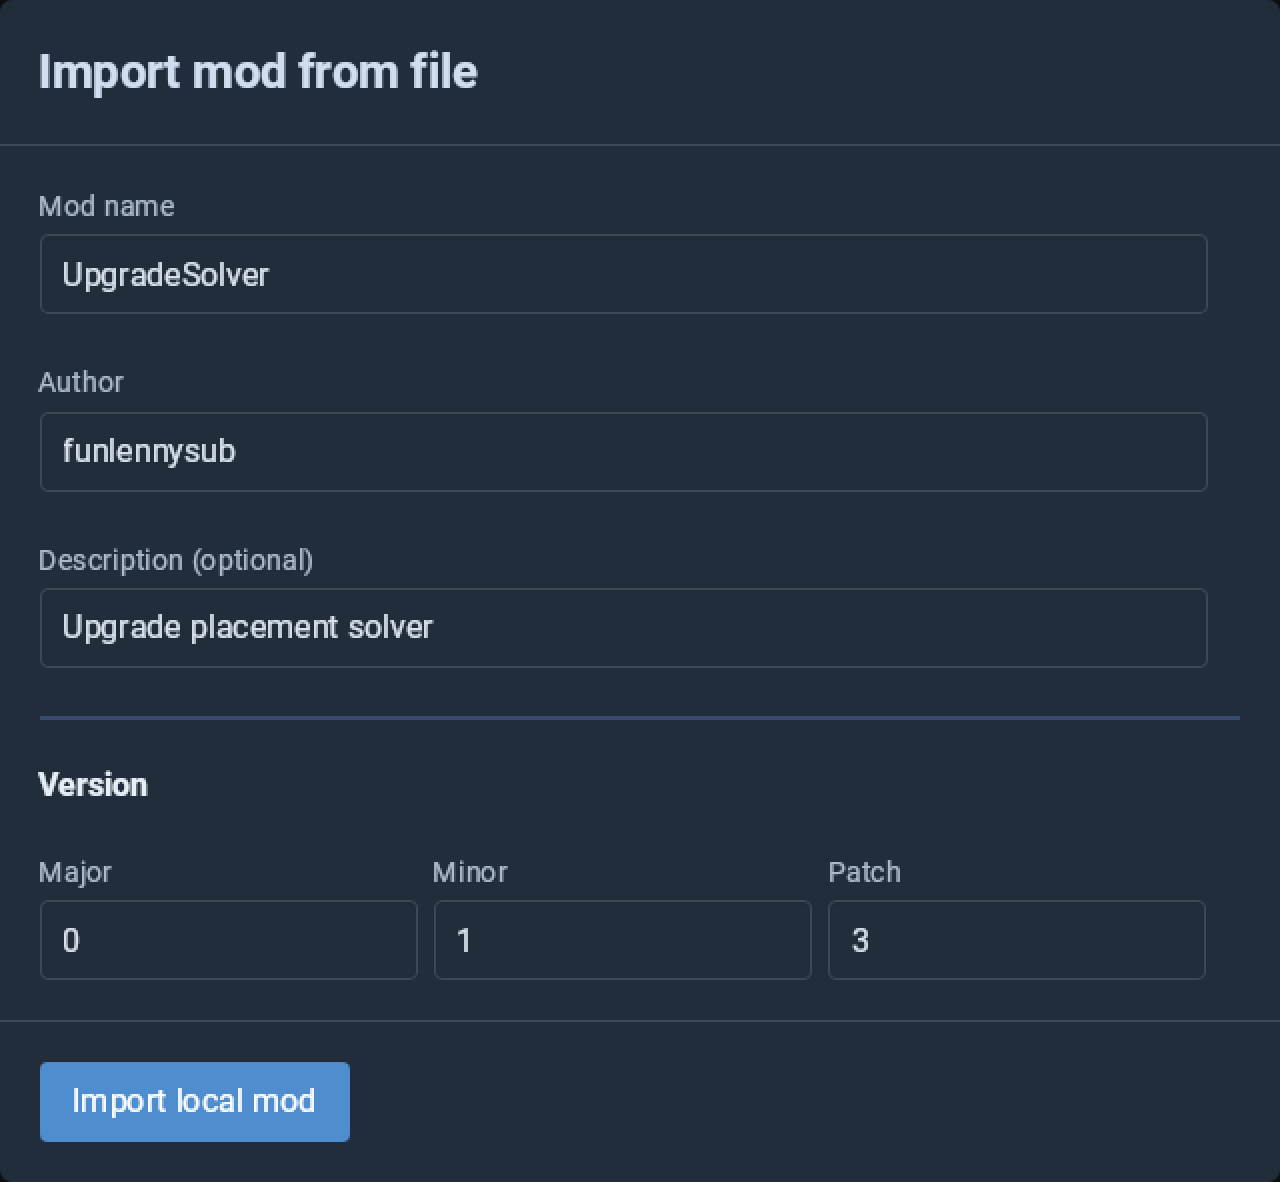
After you selected your package, you will be shown a screen on which you can make sure data is correct, if it is - click Import local mod, if not - check your thunderstore.toml and re-import again.
Once you import your mod, you should be able to see it in the list of installed mods

TIP
Don't forget to uninstall it after, in case you plan on using your published version.